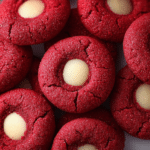
Perfectly Soft & Chewy Red Velvet Thumbprint Cookies
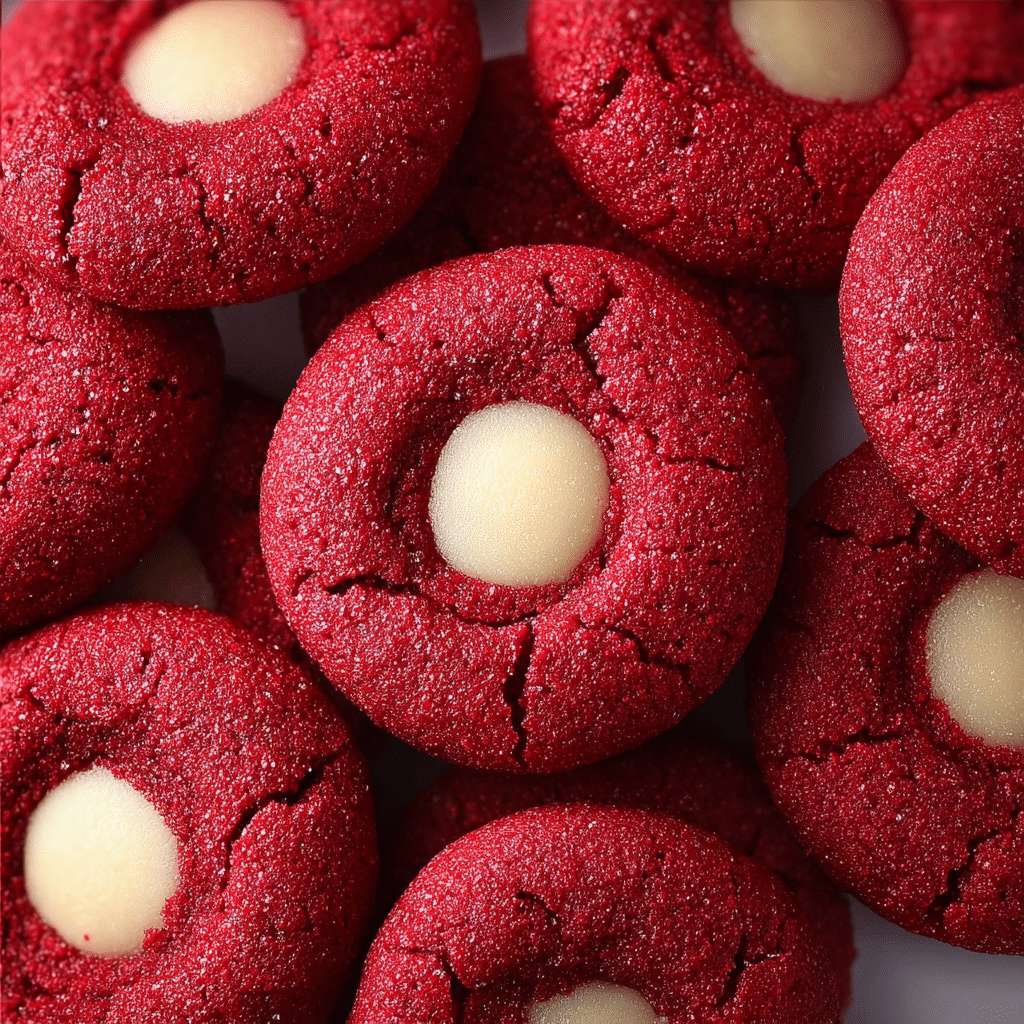
If you’re craving a dessert that combines the rich, velvety flavor of red velvet with the irresistible softness and chewiness of a cookie, you need to try these Perfectly Soft & Chewy Red Velvet Thumbprint Cookies. They feature a tender crumb, vibrant red hue, and a luscious, soft center that melts in your mouth with every bite. Whether you’re baking for a special occasion or simply treating yourself, these cookies bring the warmth of classic red velvet cake into a delightful, handheld treat that’s hard to resist.
Why You’ll Love This Recipe
- Soft and Chewy Texture: Each cookie strikes the perfect balance between tender softness and satisfying chewiness, making them addictive to eat.
- Rich Red Velvet Flavor: The combination of cocoa and vanilla creates a deep, classic red velvet taste that feels luxurious in every bite.
- Delightful Thumbprint Center: The lovingly pressed middle filled with cream cheese or jam adds a creamy or fruity surprise, elevating the cookie experience.
- Eye-Catching Appearance: Their vibrant red color paired with a luscious filling makes these cookies look as amazing as they taste.
- Easy to Customize: Whether you want to switch up the filling or adapt for dietary needs, this recipe invites creativity.
Ingredients You’ll Need
Crafting these Perfectly Soft & Chewy Red Velvet Thumbprint Cookies requires a handful of simple yet essential ingredients that work harmoniously to provide that signature texture, flavor, and color. Each item plays a crucial role, from the cocoa powder that gives a subtle chocolate note to the cream cheese that makes the filling decadently smooth.
- All-Purpose Flour: Provides the foundation for structure without making the cookies too dense.
- Cocoa Powder: Adds just enough chocolate flavor to complement the red velvet without overpowering.
- Baking Soda: Helps create a light, airy texture while boosting the cookie rise.
- Salt: Enhances all the sweet flavors and balances richness.
- Unsalted Butter: Gives the dough richness and moisture for a soft bite.
- Granulated Sugar: Contributes sweetness and helps create a slight crisp edge around the cookie.
- Brown Sugar: Adds chewiness and a hint of caramel depth.
- Egg: Binds the ingredients and adds moisture for soft consistency.
- Vanilla Extract: Elevates red velvet flavors with aromatic warmth.
- Red Food Coloring: Achieves the iconic red color to brighten your cookies.
- Cream Cheese (for filling): Offers a creamy, tangy center that contrasts beautifully with the sweet cookie exterior.
- Powdered Sugar (for filling): Sweetens and smooths the cream cheese for a luscious texture.
Variations for Perfectly Soft & Chewy Red Velvet Thumbprint Cookies
One of the best things about this cookie recipe is how easy it is to make your own. Whether you’re avoiding certain ingredients or simply want to switch up flavors, these variations add delightful twists without complicating the process.
- Jam-Filled Version: Replace the cream cheese filling with raspberry or strawberry jam for a fruity burst.
- Vegan Option: Use dairy-free butter and cream cheese alternatives, and substitute the egg with flaxseed egg.
- Nutty Twist: Add finely chopped pecans or walnuts to the dough for extra crunch and flavor.
- Chocolate Chip Surprise: Mix mini white or dark chocolate chips into the dough for melty pockets of chocolate.
- Spiced Red Velvet: Add cinnamon or a pinch of nutmeg to the batter for a warm, spiced undertone.

How to Make Perfectly Soft & Chewy Red Velvet Thumbprint Cookies
Step 1: Prepare the Dough
Start by whisking together dry ingredients: flour, cocoa powder, baking soda, and salt. In a separate bowl, cream the softened butter with granulated and brown sugars until light and fluffy. Beat in the egg, vanilla extract, and red food coloring until evenly mixed. Gradually add the dry mixture to the wet until a smooth dough forms.
Step 2: Chill the Dough
Wrap the dough in plastic wrap and chill in the refrigerator for at least 30 minutes. This helps the cookies maintain their shape and develop a firmer texture for that perfect thumbprint.
Step 3: Prepare the Filling
While the dough chills, whip the cream cheese and powdered sugar together until smooth and creamy. Set aside in the fridge so it stays firm but spreadable.
Step 4: Shape the Cookies
Preheat your oven to 350°F (175°C). Roll chilled dough into small balls, about one inch in diameter. Place them onto a lined baking sheet, spaced evenly. Use your thumb or the back of a spoon to gently press an indentation in the center of each ball.
Step 5: Bake and Fill
Bake the cookies for 10-12 minutes until edges are set but centers remain soft. Remove from the oven and immediately press the indentation again if it has puffed up. Cool slightly then spoon or pipe the cream cheese filling into each thumbprint cavity.
Step 6: Final Touches
Return the filled cookies to the oven for an additional 3-5 minutes to slightly soften the filling without melting it completely. Let them cool on the baking sheet before transferring to a wire rack to cool fully.
Pro Tips for Making Perfectly Soft & Chewy Red Velvet Thumbprint Cookies
- Room Temperature Ingredients: Make sure butter and egg are at room temperature for smoother mixing and better texture.
- Don’t Overmix: Combine ingredients until just incorporated to avoid tough cookies.
- Chill for Better Shape: Chilling the dough prevents excessive spreading and helps hold the thumbprint shape.
- Use Gel Food Coloring: It provides vibrant color without thinning your dough.
- Press Indent Twice: Press down on the thumbprint both before and after baking to create a perfect well for the filling.
- Cool Completely: Let the cookies cool fully before storing to keep their chewy softness intact.
How to Serve Perfectly Soft & Chewy Red Velvet Thumbprint Cookies
Garnishes
Enhance the cookies visually and flavor-wise by sprinkling a tiny pinch of powdered sugar, cocoa powder, or crushed nuts over the cream cheese center. Fresh berries on top also add a pop of color and a natural fruity note.
Side Dishes
Serve these cookies alongside a warm cup of coffee or a creamy glass of milk to balance the rich flavors. For a festive touch, pair them with whipped cream or a scoop of vanilla ice cream on the side.
Creative Ways to Present
Arrange cookies on tiered dessert stands for parties or gift them in mason jars layered with parchment paper. You can also drizzle melted white chocolate over the top for a luscious finish that wows.
Make Ahead and Storage
Storing Leftovers
Keep your leftover cookies in an airtight container at room temperature for up to 4 days. This helps maintain their softness and keeps the filling fresh. If it’s warm or humid, store them in the fridge wrapped tightly to prevent the cream cheese center from spoiling.
Freezing
Freeze unbaked dough balls on a sheet pan until firm, then transfer to a freezer-safe bag for up to 3 months. Bake from frozen, adding a few extra minutes to the baking time. You can also freeze fully baked and filled cookies in a sealed container, separating layers with parchment paper.
Reheating
Gently warm room temperature cookies in the microwave for 10-15 seconds to revive softness. Avoid overheating as it can toughen the dough or melt the filling too much.
FAQs
Can I use store-bought red velvet cake mix for this recipe?
While possible, using a homemade batter ensures you control the texture and flavor best suited for cookies instead of cake.
What can I use instead of cream cheese filling?
You can swap the cream cheese for fruit jams, Nutella, or peanut butter for different flavor profiles.
Are these cookies gluten-free friendly?
You can substitute the all-purpose flour with a gluten-free blend, but results may vary slightly in texture.
How do I prevent the cookies from spreading too much?
Chilling the dough and using room temperature but firm butter helps the cookies hold their shape better during baking.
Can I make these cookies dairy-free?
Absolutely! Use plant-based butter and cream cheese alternatives to keep the recipe dairy-free without losing flavor or texture.
Final Thoughts
These Perfectly Soft & Chewy Red Velvet Thumbprint Cookies are truly a treat you’ll want to bake again and again. They perfectly capture the beloved red velvet flavor in a cookie that’s soft, chewy, and packed with decadent filling. Whether for holidays, special occasions, or your own sweet cravings, this recipe is a guaranteed winner that’s easy to make and impossible to forget. Go ahead, gather your ingredients, and let the magic of these cookies brighten your kitchen and your day!
Related Posts
PrintPerfectly Soft & Chewy Red Velvet Thumbprint Cookies
These Perfectly Soft & Chewy Red Velvet Thumbprint Cookies combine the rich, velvety flavor of red velvet cake with the irresistible softness and chewiness of cookies. Featuring a tender crumb, vibrant red hue, and a luscious, creamy cream cheese or fruity jam center, they are a delightful treat perfect for any occasion.
- Prep Time: 20 minutes
- Cook Time: 15 minutes
- Total Time: 35 minutes
- Yield: 24 cookies 1x
- Category: Desserts
- Method: Baking
- Cuisine: American
- Diet: Gluten Free (substitute all-purpose flour with gluten-free blend)
Ingredients
Dry Ingredients
- 2 1/2 cups All-Purpose Flour
- 2 tablespoons Cocoa Powder
- 1 teaspoon Baking Soda
- 1/2 teaspoon Salt
Wet Ingredients
- 1 cup Unsalted Butter, softened
- 3/4 cup Granulated Sugar
- 3/4 cup Brown Sugar, packed
- 1 large Egg
- 1 teaspoon Vanilla Extract
- 2 teaspoons Red Food Coloring (gel recommended)
Filling
- 8 oz Cream Cheese, softened (for filling)
- 1 cup Powdered Sugar (for filling)
Instructions
- Prepare the Dough: Whisk together the flour, cocoa powder, baking soda, and salt in a medium bowl. In a separate bowl, cream the softened butter with granulated and brown sugars until light and fluffy. Beat in the egg, vanilla extract, and red food coloring until evenly combined. Gradually add the dry ingredients to the wet mixture, mixing until a smooth dough forms.
- Chill the Dough: Wrap the dough in plastic wrap and refrigerate for at least 30 minutes. This helps the cookies maintain their shape and develop a firmer texture for the perfect thumbprint.
- Prepare the Filling: While the dough chills, beat together the softened cream cheese and powdered sugar until smooth and creamy. Keep chilled until ready to use.
- Shape the Cookies: Preheat the oven to 350°F (175°C). Roll the chilled dough into 1-inch diameter balls and place them evenly spaced on a lined baking sheet. Use your thumb or the back of a spoon to gently press an indentation in the center of each ball.
- Bake and Fill: Bake the cookies for 10 to 12 minutes, until edges are set but centers remain soft. Remove from the oven and immediately press the indentations again if they’ve puffed up. Allow to cool slightly, then spoon or pipe the cream cheese filling into each thumbprint indentation.
- Final Touches: Return the filled cookies to the oven for an additional 3 to 5 minutes to slightly soften the filling without melting it completely. Let the cookies cool on the baking sheet before transferring to a wire rack to cool fully.
Notes
- Use room temperature butter and egg for smoother mixing and better texture.
- Do not overmix the dough to avoid tough cookies.
- Chill dough to prevent excessive spreading and maintain thumbprint shape.
- Gel food coloring is recommended for vibrant color without thinning the dough.
- Press the thumbprint indentation both before and after baking for the best filling well.
- Allow cookies to cool completely before storing to keep texture intact.
Nutrition
- Serving Size: 1 cookie
- Calories: 150 kcal
- Sugar: 12 g
- Sodium: 110 mg
- Fat: 8 g
- Saturated Fat: 4.5 g
- Unsaturated Fat: 2.5 g
- Trans Fat: 0 g
- Carbohydrates: 18 g
- Fiber: 1 g
- Protein: 2 g
- Cholesterol: 25 mg
Keywords: red velvet cookies, thumbprint cookies, soft chewy cookies, cream cheese filling, red velvet dessert