5 Irresistible Peanut Butter Blossom Bars Recipes
If you love peanut butter and crave mouthwatering desserts, these Peanut Butter Blossom Bars will quickly become your new favorite treat. Combining the classic peanut butter flavor with chewy, chewy cookie base and that irresistible chocolate kiss on top, these bars are perfect for any occasion—whether it’s a cozy night at home or a festive party. In this article, you’ll discover 5 delicious Peanut Butter Blossom Bars recipes that are easy to make, perfect for any occasion, and irresistibly tasty, guaranteed to delight your taste buds and impress your friends and family.
Why You’ll Love This Recipe
- A timeless favorite: The perfect combination of peanut butter and chocolate that appeals to all ages.
- Simple ingredients: You only need a handful of pantry staples to whip up these bars.
- Versatile and customizable: Easily adapted with different add-ins or toppings to suit any preference.
- Easy to bake: Straightforward steps that even beginner bakers can follow successfully.
- Great for sharing: Ideal for parties, gift boxes, or just a joyful treat to enjoy with loved ones.
Ingredients You’ll Need
The beauty of Peanut Butter Blossom Bars is how simple yet essential each ingredient is. Every component plays a role—whether it’s building flavor, delivering texture, or adding visual appeal—making your bars truly irresistible.
- Peanut butter: Use creamy or chunky for different textures and rich taste.
- Flour: The base that provides structure and holds everything together.
- Sugar (brown and granulated): Brown sugar adds moisture and chewiness; granulated sugar adds sweetness and slight crispness.
- Butter: Adds richness and tenderness to the bars.
- Eggs: Bind the dough and provide lift.
- Baking soda: Helps the bars rise slightly and creates a soft texture.
- Vanilla extract: Enhances the overall flavor with warm notes.
- Chocolate kisses or chips: The signature topping that melts into gooey, chocolatey perfection.
- Optional: chopped peanuts or sea salt: For extra crunch or a touch of contrast.
Variations for Peanut Butter Blossom Bars
Peanut Butter Blossom Bars are wonderfully adaptable, making it easy to switch up flavors or adjust based on dietary needs. Feel free to explore these variations and make the recipe your own!
- Vegan version: Substitute butter and eggs with plant-based alternatives and use dairy-free chocolate kisses.
- Double chocolate: Add cocoa powder to the batter and top with dark chocolate kisses for a richer chocolate experience.
- Nutty upgrade: Stir in chopped roasted peanuts or substitute peanut butter with almond butter for a new twist.
- Gluten-free: Use a gluten-free flour blend to keep the bars safe for gluten-sensitive friends.
- Chunky style: Add chocolate chips or mini peanut butter cups inside the batter for added texture.

How to Make Peanut Butter Blossom Bars
Step 1: Prepare the dough
Begin by creaming softened butter and peanut butter together with both brown and granulated sugars until smooth. Beat in the egg and vanilla extract until fully combined. In a separate bowl, whisk together flour, baking soda, and salt, then gradually add to the wet mixture to form a soft dough.
Step 2: Shape and place on baking tray
Scoop out portions of dough—about 1-inch balls—and place them on a baking sheet lined with parchment paper. Space each ball at least 2 inches apart to allow for spreading.
Step 3: Bake and add chocolate kisses
Bake the dough balls in a preheated oven at 350°F (175°C) for around 8 to 10 minutes until edges are lightly golden but centers remain soft. Immediately press a chocolate kiss into the center of each warm cookie, gently flattening it without breaking the cookie.
Step 4: Cool and enjoy
Allow the bars to cool completely on the baking sheet so they firm up. Once cooled, remove and store or serve right away with a smile!
Pro Tips for Making Peanut Butter Blossom Bars
- Use room temperature ingredients: Ensures smooth mixing and uniform texture.
- Don’t overbake: Removing the bars slightly undercooked gives a soft, chewy center.
- Press chocolate kisses gently: Prevents cracking or squashing your bars.
- Chill the dough: For thicker bars, refrigerate the dough for 30 minutes before baking.
- Use quality peanut butter: Creamy natural peanut butter enhances flavor without overpowering.
How to Serve Peanut Butter Blossom Bars
Garnishes
Sprinkle a pinch of flaky sea salt or chopped roasted peanuts over the chocolate kisses once slightly set for a delightful sweet-salty twist that elevates the flavor.
Side Dishes
Pair these bars with a cold glass of milk, a hot cup of coffee, or even a scoop of vanilla ice cream for an indulgent dessert experience.
Creative Ways to Present
Arrange bars on festive platters with colorful napkins, or stack them in mason jars tied with ribbons to gift friends and family—presentation makes these sweet treats even more special!
Make Ahead and Storage
Storing Leftovers
Keep leftover Peanut Butter Blossom Bars in an airtight container at room temperature for up to 4 days, ensuring they stay soft and delicious.
Freezing
Wrap bars individually in plastic wrap and place in freezer-safe bags or containers to freeze for up to 3 months. Thaw overnight in the fridge before serving.
Reheating
Warm bars briefly in the microwave for 10-15 seconds to revive that fresh-baked softness and melt the chocolate a bit, making them even more irresistible.
FAQs
Can I use natural peanut butter in Peanut Butter Blossom Bars?
Yes, natural peanut butter works well; just ensure it is well-stirred and has a smooth consistency for best mixing.
What if I don’t have chocolate kisses?
You can substitute chocolate chips or small pieces of chocolate bars, but kisses provide the iconic look and melting quality.
Are Peanut Butter Blossom Bars gluten-free?
The traditional recipe contains gluten, but using a gluten-free flour blend allows you to easily make them gluten-free.
How long do these bars last?
Stored properly at room temperature, they stay fresh for about 4 days and up to 3 months if frozen.
Can I make the dough ahead of time?
Absolutely! Refrigerate the dough for up to 24 hours before baking to enhance flavor and control spreading.
Final Thoughts
Peanut Butter Blossom Bars are the perfect sweet treat that feels like a warm hug from your kitchen. Whether you stick to the classic recipe or experiment with variations, these bars bring comfort, flavor, and joy every time. So go ahead, bake a batch today, and share the love with everyone around you!
Related Posts
- Irresistible Strawberry Crunch Cheesecake Cones Recipe
- Irresistible Fresh Strawberry Cupcakes with Creamy Frosting
- Irresistible Strawberry Dream Layer Cake with Cream Cheese Frosting
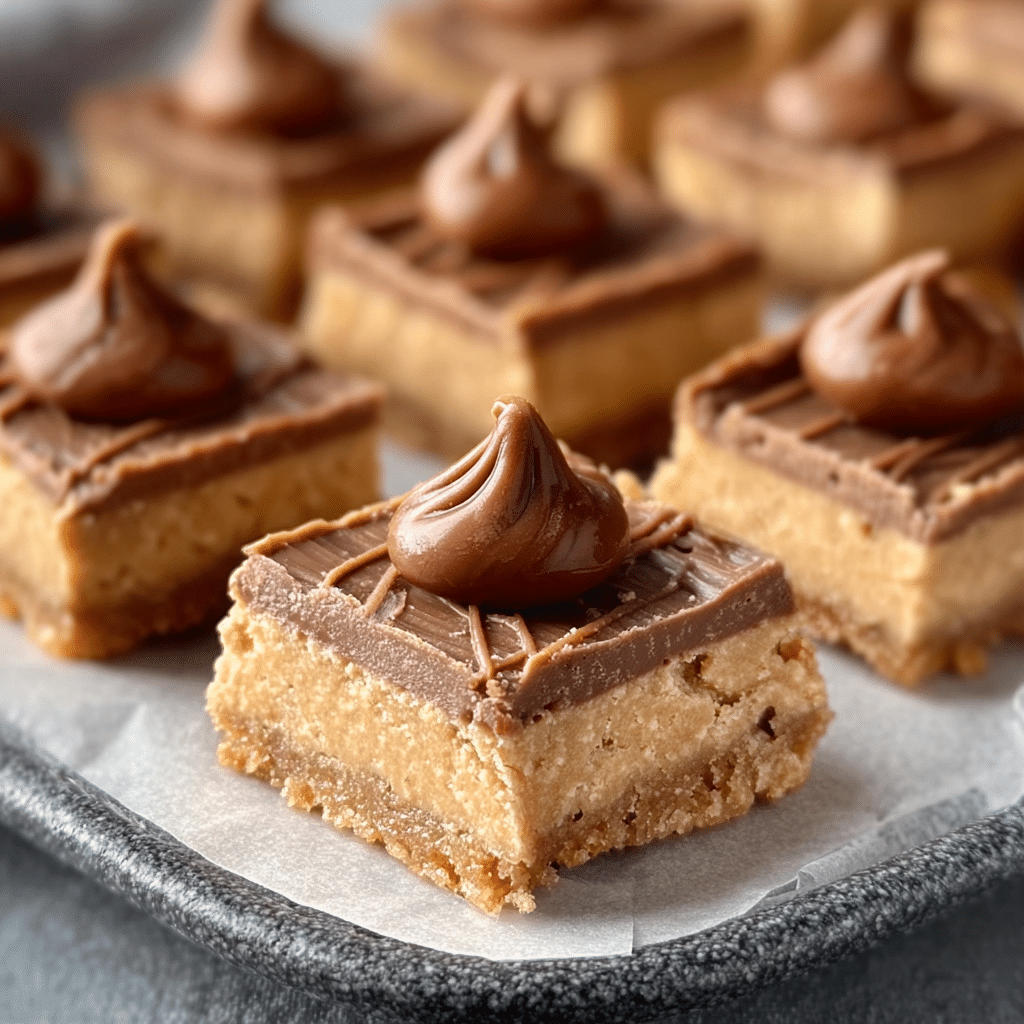
Peanut Butter Blossom Bars
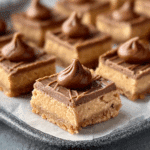
Peanut Butter Blossom Bars combine the timeless flavors of creamy or chunky peanut butter with a chewy cookie base and a signature chocolate kiss on top. These delightful bars are easy to make with simple pantry ingredients, versatile for various dietary needs and occasions, and perfect for sharing as a sweet treat that everyone will love.
- Prep Time: 15 minutes
- Cook Time: 10 minutes
- Total Time: 25 minutes
- Yield: 24 bars 1x
- Category: Dessert
- Method: Baking
- Cuisine: American
- Diet: Gluten Free (when using gluten-free flour blend)
Ingredients
Main Ingredients
- 1 cup creamy or chunky peanut butter
- 1 1/2 cups all-purpose flour (or gluten-free flour blend for gluten-free version)
- 1/2 cup brown sugar
- 1/2 cup granulated sugar
- 1/2 cup softened unsalted butter
- 1 large egg
- 1 teaspoon baking soda
- 1/2 teaspoon salt
- 1 teaspoon vanilla extract
Topping
- About 24 chocolate kisses or chocolate chips
Optional Add-Ins & Garnishes
- Chopped roasted peanuts
- Flaky sea salt
- Mini peanut butter cups (for chunky style)
- Cocoa powder (for double chocolate variation)
Instructions
- Prepare the dough: Begin by creaming the softened butter and peanut butter together with both brown and granulated sugars until the mixture is smooth and well combined. Beat in the egg and vanilla extract until fully incorporated. In a separate bowl, whisk together the flour, baking soda, and salt, then gradually add this dry mixture to the wet ingredients, stirring until a soft dough forms.
- Shape and place on baking tray: Scoop out portions of dough about 1 inch in size and roll them into balls. Place these dough balls onto a baking sheet lined with parchment paper, spacing each ball at least 2 inches apart to allow for spreading during baking.
- Bake and add chocolate kisses: Preheat the oven to 350°F (175°C). Bake the dough balls for 8 to 10 minutes until the edges are lightly golden but the centers remain soft. Immediately after removing from the oven, press a chocolate kiss gently into the center of each warm cookie, slightly flattening it without breaking the cookie.
- Cool and enjoy: Allow the bars to cool completely on the baking sheet so they firm up properly. Once cooled, transfer them to a storage container or serve immediately with a smile.
Notes
- Use room temperature ingredients to ensure smooth mixing and uniform texture.
- Don’t overbake; slightly undercooking the bars results in a soft, chewy center.
- Press the chocolate kisses gently to prevent cracking or squashing the bars.
- For thicker bars, chill the dough for 30 minutes before baking.
- Use quality creamy natural peanut butter for enhanced flavor without overpowering.
Nutrition
- Serving Size: 1 bar
- Calories: 180
- Sugar: 14g
- Sodium: 120mg
- Fat: 10g
- Saturated Fat: 3g
- Unsaturated Fat: 6g
- Trans Fat: 0g
- Carbohydrates: 18g
- Fiber: 1g
- Protein: 4g
- Cholesterol: 25mg
Keywords: peanut butter bars, peanut butter blossom bars, chocolate kiss cookies, chewy peanut butter bars, gluten-free peanut butter dessert